Within the Submitted Applications section of CrossConnect you can view all of the information associated with an application without having to download the application out of CrossConnect.
Each application record contains the following four tabs: General, Application, Attachment, and Tasks. By default, the General tab appears first. Each tab is described below.
General Tab
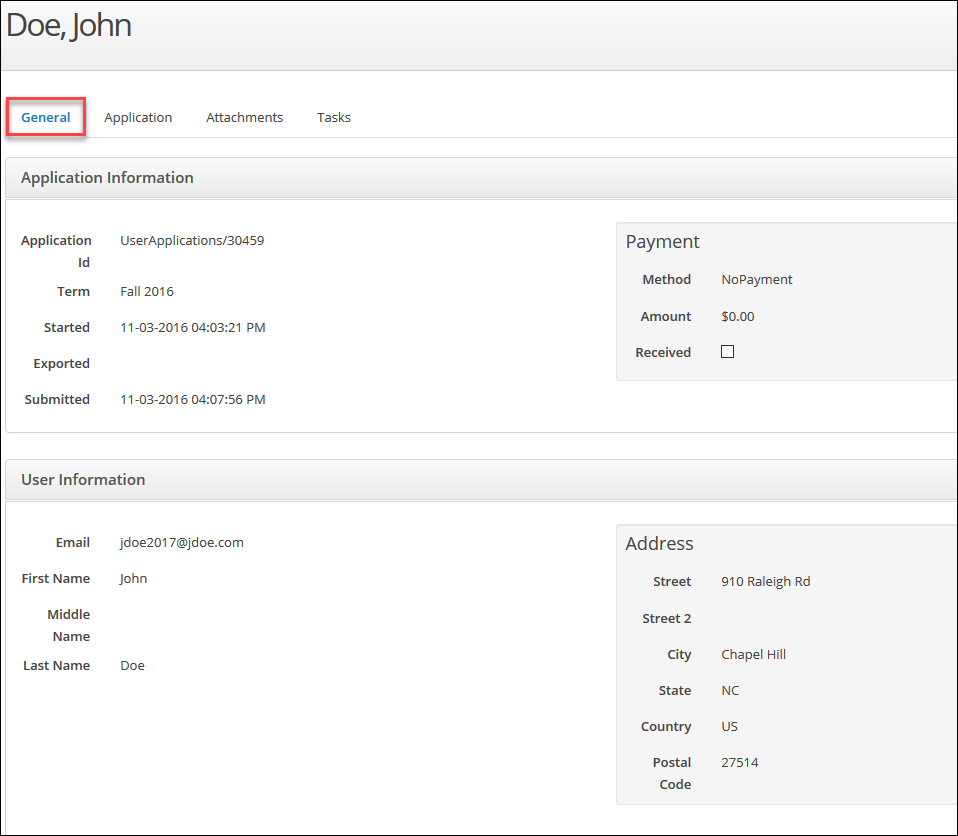
The General tab contains a quick review of important information about the application and applicant. Specific data from the General tab is as follows:
- The Application Information shows information about the submitted applications
- Application Id: Unique identifier for submitted application
- Term: Enrollment term name selected on the submitted application
- Started: Date and time the applicant started the application
- Exported: Last date and time the application was exported from CrossConnect
- Submitted: Date and time the application was completed and submitted to your campus
- Payment Method: Payment option selected by the applicant
- Payment Amount: Application fee on the application at the time it was submitted
- Payment Received: If the payment has been marked as paid, this box will be checked (NOTE: if you have no application fee, this will always be unchecked)
- The User Information shows information about the applicant from their CFNC profile
- Email: Email address
- First Name: First name
- Middle Name: Middle name (this is optional, so could be blank)
- Last Name: Last name
- Address Street: Street address
- Address Street 2: Street address (this is optional, so could be blank)
- Address City: City
- Address State: State
- Address Country: Country
- Address Postal Code: Zip code
Application Tab
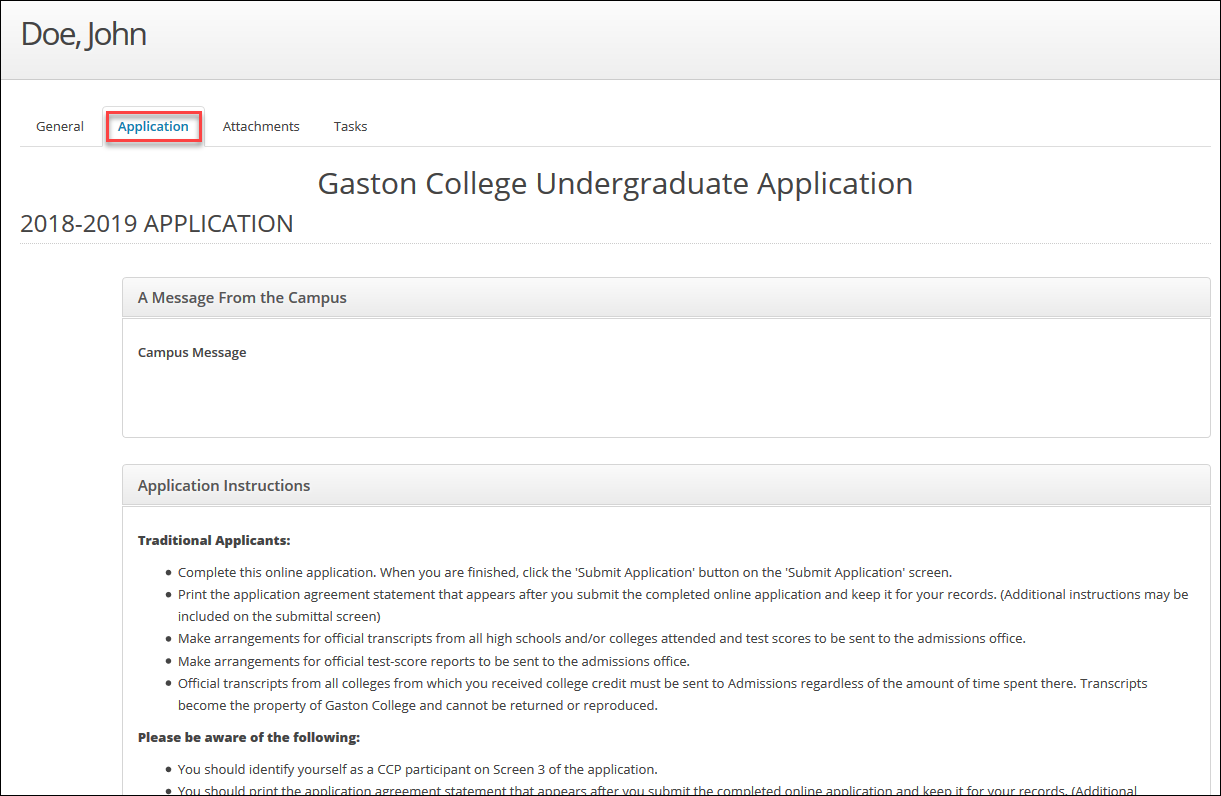
The Application tab contains every field label on the application and the applicant’s response to those fields. While all question titles appear, only required fields are guaranteed to have a response from the applicant. The application is shown in the same order as the information and fields appear to the applicant when completing the application.
Note: This view shows the current application questions. If you have made application changes since the applicant applied, those changes appear on this view, but did not appear for the applicant (since they were made after they submitted their application).
- All information shown here is from the submitted application, not the profile used to submit the application.
- Scroll down to see all application data separated by section and group
Attachments Tab
The Attachments tab contains any attachments that the applicant uploaded within the application itself.
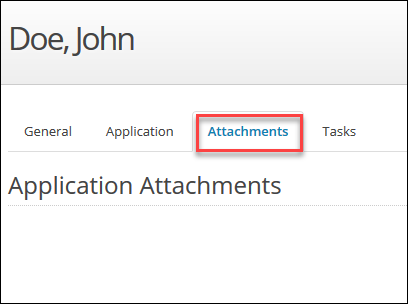
- If you do not have a field on your application setup as an attachment upload field, then this tab will be blank.
- If you do have an attachment field on your application, but the question is optional, this tab could still be blank if the applicant opted not to answer the question.
Tasks Tab
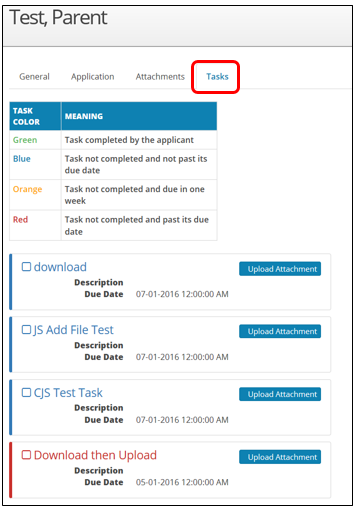
The Tasks tab contains information about the status of application tasks for the applicant. Here you can mark tasks as complete, see what tasks were active and assigned to the applicant when they submitted the application, and view attachments that the applicant uploaded for a particular task. For more information about creating and using tasks, please see the Help Center article on Tasks.
- Tasks are color-coded so you can quickly see what has been accomplished, what is still outstanding and what was completed late.
- Green Tasks: Tasks completed by the applicant
- Blue Tasks: Tasks not completed but not past its due date
- Orange Tasks: Tasks not completed and due within one week
- Red Tasks: Tasks not completed and past their due date
- For each task, no matter the status, basic information is available:
- Task Checkbox: This check box indicates if the task is complete (checked) or not (unchecked). NOTE: For more information about this process, see section below, “Manually Managing a Task for a Specific Applicant.”
- Task Name: The name assigned to the task when created by the college and what the applicant sees in the Application Hub for application tasks associated with your application
- Description: The instructions for the task provided by the campus when the task was created. Applicants can see these within the tool tip for the specific task in the Application Hub (Note: This is an optional item for the campus when creating the task, so it could be blank)
- Due Date: The date the task is due. That date is set and controlled by the campus
- Upload Attachment button: Click this button to manually attach a document to the applicant’s task
- For completed tasks, additional information is available:
- Completed Date: The date either the applicant completed the task (if the task is set to “User can complete”) or the date the campus manually marked the task complete
- View Attachment: Click the link to view an attached document. This is available if the applicant uploaded a document to complete the task or the campus manually uploaded an attachment to the task for the applicant, by clicking the Upload Attachment button
Manually Managing a Task for a Specific Applicant
A task can be manually marked as “completed” by the campus. The manual completion is easy and documents can be attached to the manually completed task.
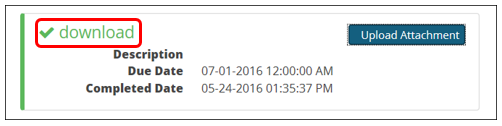
- Click the checkbox next to the task name. This will add a checkmark in place of the checkbox, and the task’s color will change to green to indicate it’s complete.
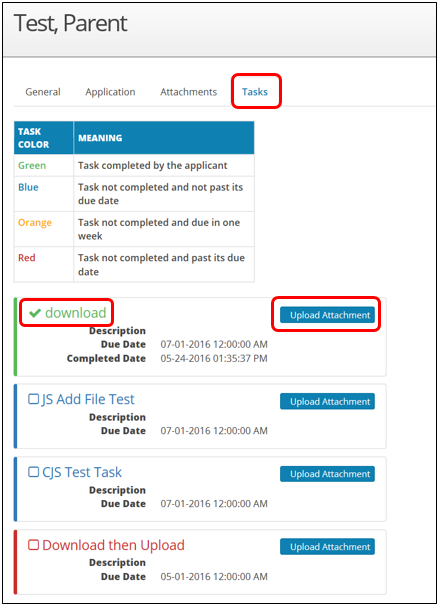
- (Optional) If a document needs to be added to the completed task, click the Upload Attachment button (
 ).
).
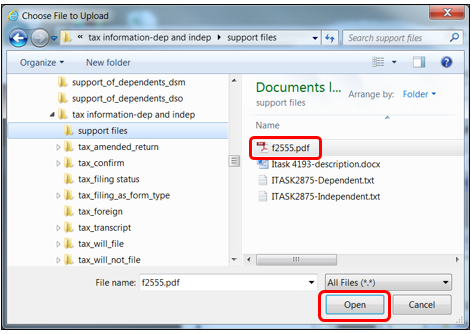
- Find the document you wish to attach
- Click Open
A task can be manually marked as “not complete” by the campus. This might be used if the applicant uploads the wrong document in the Application Hub or if an updated document is later sent to the campus.
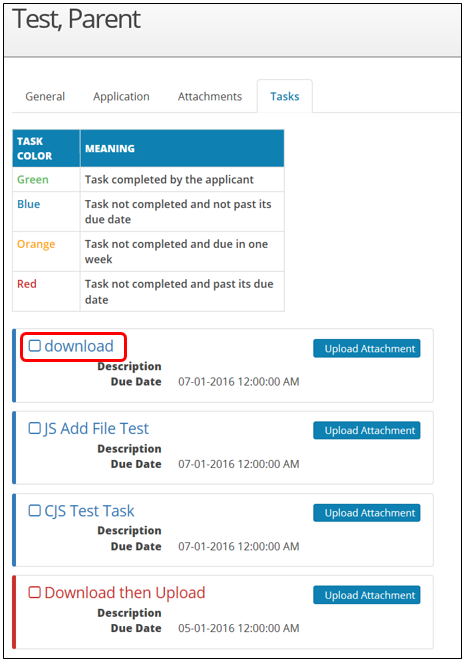
- Click the checkmark next to the completed task name. This will change it back to a checkbox and the task’s color will change to blue, orange or red, depending on if it’s past the task’s due date.
Common Applicant Submitted Application (Examples)
View Never Exported Applications
You want to see all applications that were submitted but not yet exported from CrossConnect
- Click the Filter (
 ) icon
 - Select the Never Exported check box
- Click on the Apply Filter (
 ) button; only applications that have never been exported will be displayed
At the bottom of the screen, it will show how many applications are being displayed on the current page and how many total applications meet your filter criteria of never exported.
Manually Mark a Task Complete
You want to mark applicant’s task as complete.
- Type All or part of an applicant’s name into the Search box at the top of the main Submitted Applications screen
- Double-click on his applicant record in the results (or just click once on his name to select)
- Within the applicant record, click the Tasks tab
- Click on the checkbox next to one of the task names; this will change the checkbox to a checkmark
- The color of the task will change to green to show it’s completed. The Completed Date will also display and update to the current date.
The task will be automatically marked as complete and will be reflected as such in the applicant’s CFNC.org Application Hub.
Manually Unmark a Task as Complete
You want to unmark an applicant’s completed task.
- Type All or part of the applicant’s name (the same one that you used in the previous exercise) into the Search box at the top of the main Submitted Applications screen
- Double-click on his applicant record in the results (or just click once on his name to select)
- Within the applicant record, click the Tasks tab
- Click on the checkmark that appeared after you completed the task in the previous exercise; it will change the checkmark to a checkbox
- The color of the task will change back to blue, orange, or red depending on task’s due date
The task will be automatically unmarked and listed as incomplete, and will be reflected as such in the applicant’s CFNC.org Application Hub. Now the applicant will be able to upload his corrected essay using the Application Hub.