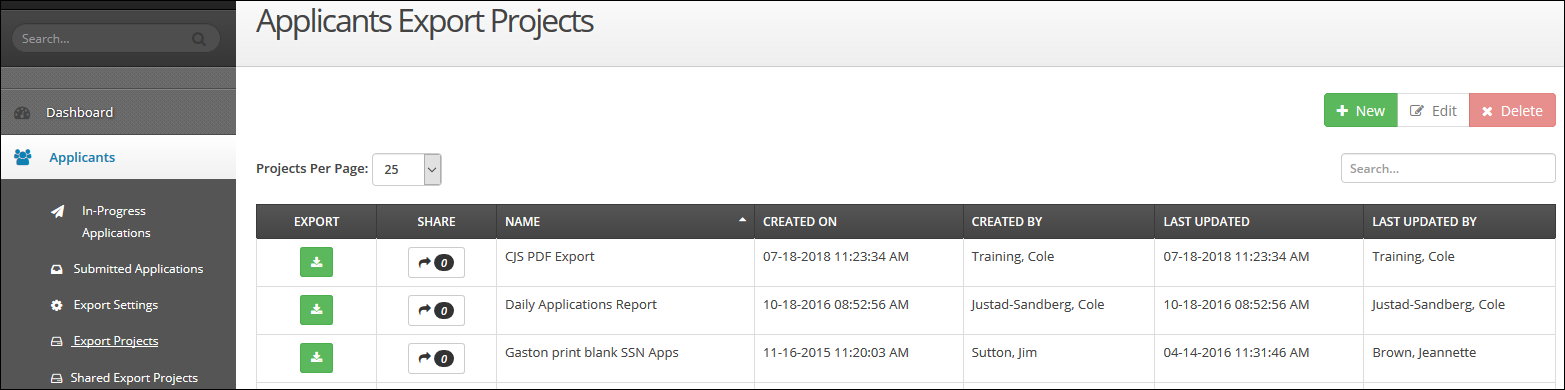
Creating an Export Project is the second step in the three-step process of downloading data.
- Create a New Export Project - Click the + New button (
 ) at the top of the screen. The Edit - New Project screen appears.
On the left side of the screen there are the Export Project download details and on the right side of the screen, you are able to select what Export Settings you want to include in your download. The ability to download more than one Export Setting at a time, within an Export Project, allows for less downloads.
- Enter the Name of the Export Project - Type the Name for your new application Export Project. This is a unique name assigned to the setting when it’s created. This populates to the main Export Project screen
- Select a Rule if Needed - If desired, select a Rule to filter your data downloads (Note: adding a rule narrows the data pool from all available information to just the information that matches your rule). From this Dropdown menu, a list of all rules in your selected application. This includes application dynamic rules and those you have created. You can type into the list to perform a smart search for the rule you want or scroll. This step is optional. For more information on rules, please see the “CrossConnect – Creating and Using Rules” documentation
- Enter the File Name - Type the File Name for your new application Export Project. This is the name of the zip file that gets downloaded. If you want the date and time downloaded to populate to the file name, add the following to the field (case-sensitive): {MM-dd-yyyy hh-mm-ss}
- MM: two-digit month
- dd: two-digit day
- yyyy: four-digit year
- hh: two-digit hour
- mm: two-digit minute
- ss: two-digit second
Note: If you are going to download the same Export Project multiple times a day, it’s a best practice to include the date and time stamp.
- Enter the Folder Name - Type the Folder Name for your project. This is the name of the folder within the zip file that contains your Export Setting data. If you are downloading as separate files and not a combined file you can add a field key into the folder name to personalize the downloaded folder with information from the submitted application:
- You can add fields from the application to the File Name by entering the field key(s) with double brackets, as part of the name (ex: File Name: PDF Application [[StudentNameLast]] [[DOB]])
- If you do not know your field keys, you can either find them in the Application | Edit Application | Form section or email cfnc-campus@northcarolina.edu for assistance
- If you want the date and time downloaded to populate to the file name, add the following to the field (case-sensitive): {MM-dd-yyyy hh-mm-ss}
- MM: two-digit month
- dd: two-digit day
- yyyy: four-digit year
- hh: two-digit hour
- mm: two-digit minute
- ss: two-digit second
Note: If you are going to download the same Export Project multiple times a day, it’s a best practice to include the date and time stamp.
- Enter the Maximum Applicants to Download - Type the Maximum Applicants to Download. This is the maximum number of records you want exported per download for every Export Setting you include in the Export Project. For PDF's this limit is 200 to ensure optimal performance. Flat Files can be set up to the maximum number of 500.
Note: For PDF files, if you set the Maximum Applicants to Download to a number greater than 50 it will put your download into a queue and send an email to the email address connected to your CrossConnect account when it is ready and available for download. It will also be available via the Recent Export Files window on the Dashboard.
- Enter the New Application Cutoff Date - Type your New Application Cutoff Date: All submitted data (applications, transcripts, attachments, etc.) from this date forward in time will be considered “new” to this Export Project. Setting this date will prevent the Export Project from downloading all data ever received and limit it to just your new data
- Choose the Options Needed - The Options are optional.
- Combine Export Setting Into One File: Each Export Setting within the Export Project downloads as one file with all the applicant data (i.e. one export setting for applications would result in an export folder with one document with all the applications in one large file)
- Combine All Results into One PDF File (All settings must be PDF or attachments): If all the Export Settings within the Export Project are in the PDF or Attachment formats, this option will combine them all into one large PDF file within the export folder
Note: If you do not select either option, your data from your Export Settings will download as a single file per student per download setting (i.e. one Export Setting in the Export Project where each student has their own standalone file within the exported folder; two Export Settings in the Export project where each student has a standalone file for each of the two settings for a total of two files per student within the exported folder)
- Add the Export Setting(s) Needed - On the right side of the screen under Export Settings, click the + Add Settings button (
 ). The Add Export Setting window appears where you will select one or more Export Settings to include in your Export Project
 - Select the Settings to Add - In the Add Export Setting window, click the Plus icon (
 ) next to the Export Setting name that you want to include in your Export Project You can select as many as you like. However, the more settings included the larger the file will be. Remember large files can take a long time to download. If you include more than three settings in one Export Project, it’s suggested that you keep you Maximum Applications To Download number low
 - Save the Added Settings - After you made your selections, click the Save button (
 ) at the bottom of the Add Export Settings window
 - Save the Export Project - Click the Save button (
 ) at the top of the Edit screen to save your Export Project
Exporting Application Data
The third and final step, in the three-step process of downloading data, is to download your exported data. Every time you want to download your application and/or transcript data, you must do the following:
- Click the Export icon (
 ) next to the Export Project you want to use to download data
 - The total number of records available for download appears at the top of the screen. This represents the number of “new” records since you last ran this download (or from the “New Application Cutoff Date” you set in your Export Project)
- If you do not put any filters in place, you will download all of the new applications indicated at the top of the screen (up to the “Maximum Applicants to Download” number you set in your Export Project)
- The filters available are:
- User Application Id: You can download one specific user’s application by entering their unique Application ID. Using this filter will only download one applicant at a time
- Submitted Between: Allows you to download applications submitted within a given date range. You can type the full date (mm/dd/yyyy) into the date fields or use the calendar that pops up when you click the fields
- With a filter(s) selected, you will download all of the records that meet the filtered criteria (up to the “Maximum Applicants to Download” number you set in your Export Project)
- You can clear any selected filters by clicking the Clear Filter button (
 )
)
- Click the Export button (
 )
)
Once your download is successful, you will see the message “Export file successfully generated. [Number of records] exported.” The Download Export File button will also appear.
- Click the Download Export File button (
 ) download your zip folder to a desired location on your computer.
-OR-
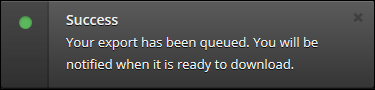
If you are trying to download a batch of PDFs with more than 50 applications in it you will see a message "Success Your export has been queued. You will be notified when it is ready to download" and you will receive an email when the file is ready for download.
Your export setting(s) have now been downloaded and are contained within the zip folder. To open the zip folder, you will need to extract the files. You can do this by either double-clicking on the zip folder (if you have a file extractor program set up as default on your computer) or right-click on the zip folder and select Extract Files.