Now that you started creating your Export Settings (by designating export type and the names), it’s time to select the application fields you want to include in your data export
- Navigate to the Fields Tab - Click the Fields tab
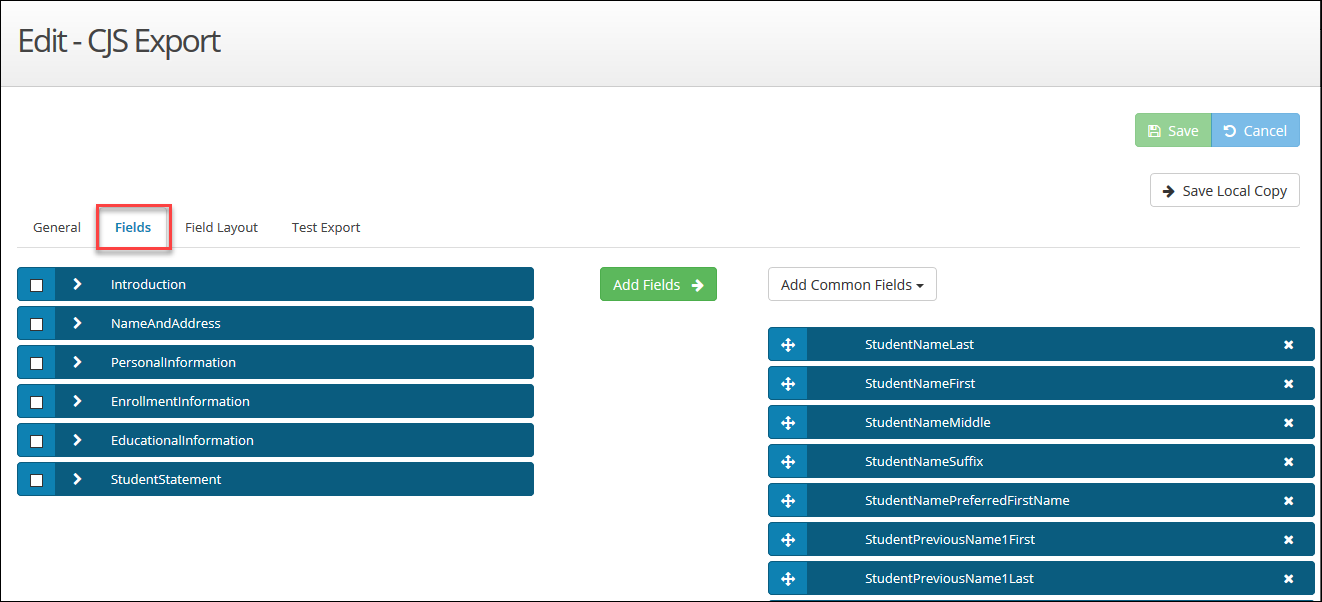
On the left side of the screen, you have all the fields from your application in their sections and groups, in the order they appear on your application. On the right side are the fields that are included in your Export Settings. You need to move fields you want from the application source on the left to your setting on the right.
- Expand Application Source - To expand your application source information, click the > icon (
 ) next to a section name to open up groups and fields; click the > icon (
 ) next to a group name to open the fields
 - Select the Fields Needed - You can select an entire section (including all groups and fields within it) by clicking the checkbox (
 ) next to the section name. You can select an entire group (including all fields within it) by clicking the checkbox next to the group name. You can select specific fields by clicking the checkbox next to the field names
 - Add the Fields - Once you select your sections/groups/fields, click the Add Fields button (
 ) to move the selected items from your application source into your export setting project
 - Add Additional Fields as Needed - Repeat steps 2-4 if needed until you have all the fields you want to collect in your Export Settings
- Add Non-Application Fields as Needed - You can add fields that are outside your application, but commonly used, by clicking on the Add Common Fields dropdown (
 ). These fields include:
- Date Started: The date the applicant first started the application
- Date completed: The date the applicant completed and submitted the application
- Term: The term for which the applicant submitted an application
- Payment Method: What payment the applicant selected (no payment, check, fee waiver, credit card)
- Payment Received: When the applicant’s payment was received (Note: Credit card payments will have this information as soon as the application is submitted)
- Payment Received Date: The date the payment was received from the applicant
- Payment Amount: The application fee
- Static String: Insert a string into your Export Setting when you need a placeholder or standardized data to populate to the export
- ID: This is a unique application identifier, specific to the specific application and applicant. Applicants get this number on their confirmation screen.
- Reorder the Fields as Needed - You can click and drag the icon (
 ) to reorder the fields in your Export Setting
 - Edit Fields as Needed - You can edit a specific field in your Export Setting by double-clicking on it to open the Edit Export Field window (this is an OPTIONAL step)
- Key: The unique name given to the field. It should not be changed. This can be used in with double brackets around the field ([[Key]]) to have the field populate within the Single File Name on the General tab
- Title: This is the field prompt that will populate to your exported application document. You can change this to whatever you like. It accepts letters, numbers and special characters
- Application Field Key: The unique name given to the field on the application. It cannot be changed
- Formatter: This is the primary edit function where you can edit the applicant’s responses into the format that you need.
- To Lower Case Formatter: Converts the applicants answer to all lower case, no matter how they entered it in the application
- To Upper Case Formatter: Converts the applicants answer to all upper case, no matter how they entered it in the application
- To Title case Formatter: Converts the applicants answer to all title case, no matter how they entered it in the application
- Replace Line Returns and Tabs with a Space Formatter: Converts all returns and tabs within an applicant’s response to a space (this is helpful with tab delimited projects)
- Date and Time Formatter: Converts the date and time information collected by this application field to a date and time format you specify
- Phone Number Formatter: Converts the phone information collected by this application field to a phone format you specify
- Remove All Special and White Space Characters Formatter: Removes all special characters and white space characters from the answer, if the applicant included them in their answer
- Replace Value Formatter: Allows you to convert one or more answers to a field to an answer value you desire (this is one of the most commonly used formatters and is typically used with country codes and NC county codes)
- For PDFs, Edit Layout - If you are creating a PDF Export Setting, you will need to click the Layout tab to set the layout type of your PDF document; all other formats can skip this step. The layout types for PDF documents are:
- Use the Application Layout: Uses the exact layout of your online application (like you see in Applicant | Submitted Applications | Application). This option is only available if you selected your fields at the section, group, and field levels on the Fields tab
- Two Column: Field labels and data are shown in two columns across the page
- Three Column: Field labels and data are shown in three columns across the page
- Four Column: Most common layout and most space saving. Field labels and data are shown in four columns across the page
- Use a Custom Layout: Here you can enter in HTML code to create a customized layout. You can copy code directly from other HTML editors like DreamWeaver.
- Save the Export Setting - Now that you selected your fields, their locations in your Export Settings, any field formatting and (if applicable) your PDF layout, click the Save button (
 )
)
Exporting a Test Application File
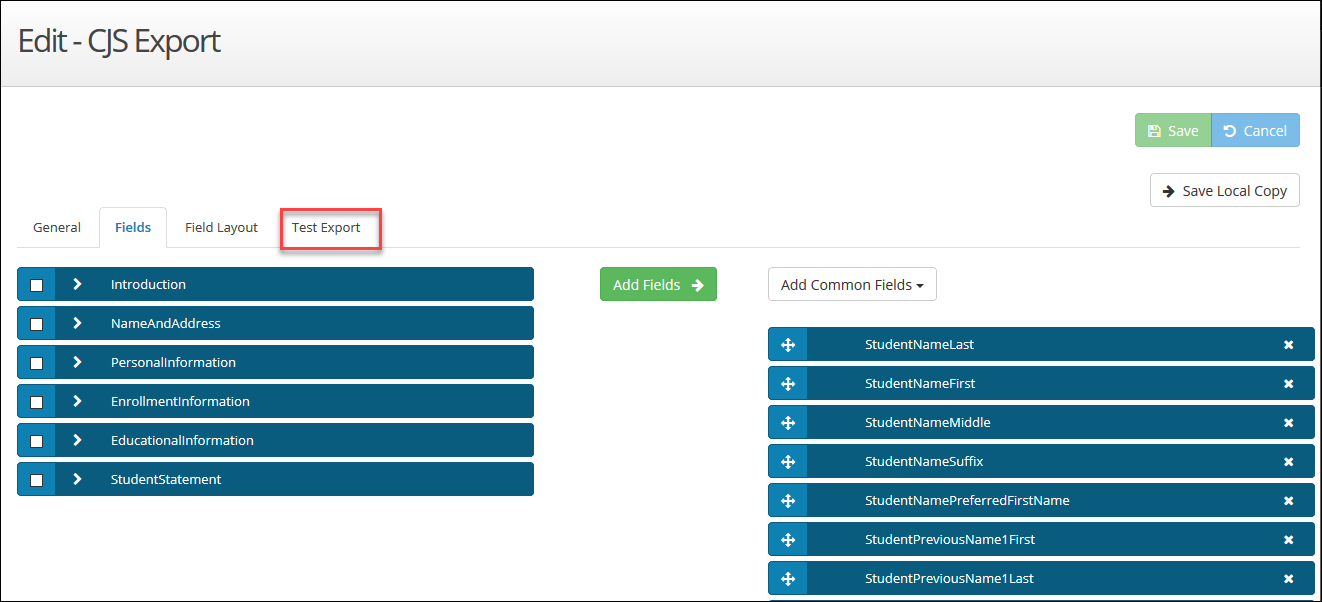
Once you save your export settings, the Test Export tab will appear. Here you can export a test application file, using the settings you just specified on the General tab in Export Settings. Exporting a test file from Test Export will not impact your count of new applications (those that have not been exported yet) nor be reflected as exported in the Submitted Application Report. To test the setting:
- Navigate to the Test Export Tab - Click the Test Export tab
- Set the Filter - Set a filter to ensure the downloaded test file is a manageable size. The filters available to you are:
- Term: A dropdown list of enrollment term names that have submitted application data or are created in your CrossConnect system. You can type into the list to perform a smart search for the term you want or scroll
- Rule: A dropdown list of all rules in your selected application. This includes application dynamic rules and those you have created. You can type into the list to perform a smart search for the rule you want or scroll to find it
- Submitted Between: Allows you to download applications submitted within a given date range. You can type the full date (mm/dd/yyyy) into the date fields or use the calendar that pops up when you click the fields
- Download as a Single File is Desired - If you want the test file to download as one large, continuous file, check the As One File checkbox (
 ). The default, unchecked status, will download each file separately into a zip folder
 - Click the Export Button - Click the Export button (
 ) to download your test file with your selected filter(s) in place
- When the test file is successfully generated you will see the message “Export file successfully generated. [number of records] exported.” The Download Export File button will also appear
- Download the File - Click the Download Export File button (
 ) to download and open your test file export
 - Review the Test File - If everything in the test file is as you want it, then you are ready to move on to Export Projects. If you need to make any edits, click on the General tab to do so